Posted by Demo Duck
By now you’re probably well aware of the benefits of including video in your content marketing strategy. It can increase time on site, improve your chance of showing up in organic search results, differentiate you from your competition, and humanize your brand. But if you’ve never produced video content in-house before, it can be a scary proposition. If you’re new to the world of business video, don’t fret.
Here are 10 steps to creating your very own in-house video content:
1. Identify the right content
For starters, you need to determine what type of content to produce. Since this post is all about in-house video, focus on content that leverages your own internal people and knowledge and doesn’t require a lot of added production value.
A great place to start is your FAQ page or customer service department. Figure out what questions customers are asking most, and turn the answers into a video. Or run a report on your most popular blog posts and make a video for each one.
At my company Demo Duck, the most frequently asked question is, “How much does an explainer video cost?” So, in addition to writing a blog post about it, we shot a video with our account manager, Laura.
2. Complete a creative brief
Once you have a topic selected, fill out a creative brief. It doesn’t have to be long, but it should cover the essentials, including your main objective for the video, the target audience, and the key talking points you’d like to cover. A creative brief ensures you and your team are in alignment and will save you time and headaches down the road.
3. Find the right expert
With a creative brief in place, it’s time to find an expert. You’re looking for the person in your organization who knows the most about the topic at hand. Ideally, this person will also be the most passionate about the content and help you craft and deliver a compelling message, even if they’ve never been in front of a camera before.
4. Write a script
Now it’s time to write a script, the foundation of every video. Unlike academic writing, keep your video script conversational and jargon-free, and try to use short concise sentences. This is especially helpful when your expert is trying to memorize lines and deliver them without sounding like a robot.
As a rule of thumb, 150 words is equal to about a minute of video content.
When you think you have a camera-ready script, do a table read (get everyone involved around a table and read the script out loud) and then edit, edit, edit until you have something that sounds natural. If there are a few lines or sections you’re unsure of, feel free to record a few different variations and select your favorite during the editing process.
5. Pick the best location
Like real estate, the location you select to shoot your video is extremely important. A good location should fit the following criteria:
- Size: It should be large enough to fit your subject, crew (1-2 people), and gear comfortably. Usually, this means something 6 feet by 10 feet or larger.
- Sound: You need to have as much control over external sound as possible. This means a quiet spot without distractions. It also means having control over the HVAC system.
- Light: Depending on the time of day and weather, windows may or may not work in your favor. If it’s a nice overcast day with even light, then the extra daylight will really help brighten up your video. But, if the sun is too bright, casting shadows or moving behind clouds every few minutes, try closing the blinds or finding an interior room with no windows.
If you have space, it’s ideal to have a dedicated video room. That way, you can leave your equipment set up at all times, which makes it that much easier to jump in a room and shoot a quick video.
6. Select a camera and lens
With all of your pre-production work complete, let’s talk gear. For some folks, the phone you have in your pocket will do the trick (just make sure to review these tips from Wistia first). For others, it’s worth investing in a DSLR, like the Canon Rebel T5i, Canon 70D, or Canon 5D Mark III. DSLRs are relatively cheap, portable, and do well in low-light situations. For most businesses just getting started in video, any of these options should suffice.
As for lenses, most DSLRs can be purchased with a stock zoom lens. This serves as your all purpose lens and can be used in a variety of situations. If you’re looking to improve the image quality, try a 24mm or 50mm prime lens. Most experts will tell that if you’re going to spend extra money on video equipment, you should spend it on a lens.
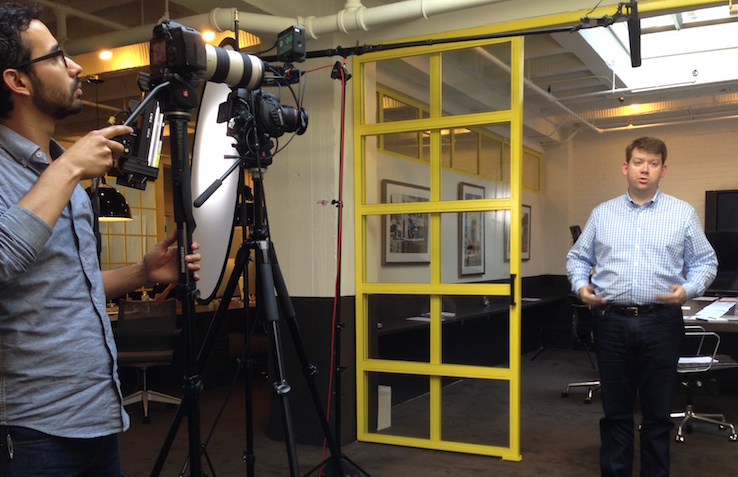
7. Assemble a lighting package
Regardless of the camera you’re using, good lighting is a must. Without proper lighting, your subject is going to appear dark and give the video a drab, amateur vibe. For a basic interview setup like we’ve been talking about, you’ll want two to three lights (one to two on the subject, and one on the backdrop). You can assemble a kit at your local hardware store for under $100, or spend a few hundred dollars on something a little more professional.
For the past year, we’ve been using a dimmable ring light on the subject and a simple clamp light with a daylight CFL from Home Depot for the backdrop. That setup runs around $300. If you’re looking for something even more powerful and professional, you could spend $500 to $1,000 and order a couple of 1×1 LED panels or some fluorescent Kino-style lights.
8. Don’t forget sound
Whatever you do, don’t rely on the microphone in your camera or phone. Nothing kills a great looking video like bad audio. In order to get high quality, crystal clear sound, you need to use an external microphone and audio recorder. Again, your phone is a valid option, but it must be mounted above the subject and out of view. If you have the budget, invest in a portable digital recorder like the Zoom H5 ($270) and the Rode NTG2 shotgun mic kit ($600).
9. Bring the energy
During the shoot, keep the energy level high. Whether it’s the person behind the camera or someone else, there should be someone dedicated to helping the subject review lines and deliver them with a smile. If your subject is nervous or hitting a mid-afternoon slump, it’s going to show up on camera.
10. Edit the footage
Once you’re done with the shoot, all that remains is piecing everything together. The decision of which video editing software to use really depends on how tech-savvy you are, and how much time you have to learn a new piece of software. For beginners, I’d suggest sticking with iMovie, Windows Movie Maker, Camtasia, or Screenflow (the last two are best for screencast video production). If you’re feeling a little more adventurous, try Final Cut or Adobe Premiere, the current industry standards.
If you don’t have the time to mess around with editing or learning software, hire a freelancer. If you plan it right, you can hire a freelance editor for a day or two and have them put together two or three videos. It will save you and your team time and should speed up the overall production process.
With these 10 steps in your back pocket, you should have everything you need to start producing in-house video content. With a little practice, you’ll be well on your way to creating new, valuable video content for your customers (and Google) to discover.
Sign up for The Moz Top 10, a semimonthly mailer updating you on the top ten hottest pieces of SEO news, tips, and rad links uncovered by the Moz team. Think of it as your exclusive digest of stuff you don’t have time to hunt down but want to read!
from Moz User Generated Blog https://moz.com/ugc/10-simple-tips-for-creating-winning-video-for-your-brand
via My Media Pal
Filed under: Digital Marketing Strategy, Marketing Strategy, Online Strategy, Search Engine Optimization, SEO, SEO Strategy, SEO Tips ![]()
from SEO NYC https://mymediapal.wordpress.com/2016/05/17/10-simple-tips-for-creating-winning-video-for-your-brand/
via SEO NYC Blog
